Ambilight LED clone
This week I built an ambilight clone.

I’m very happy with the result and it was fun to build.
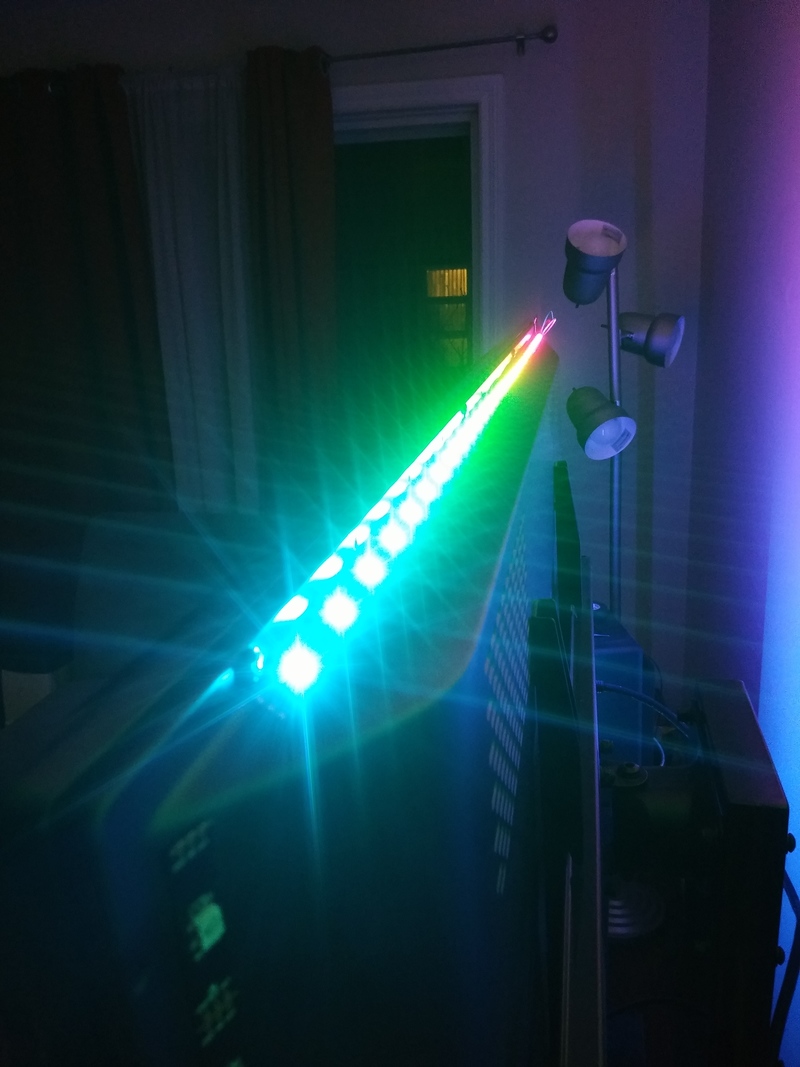
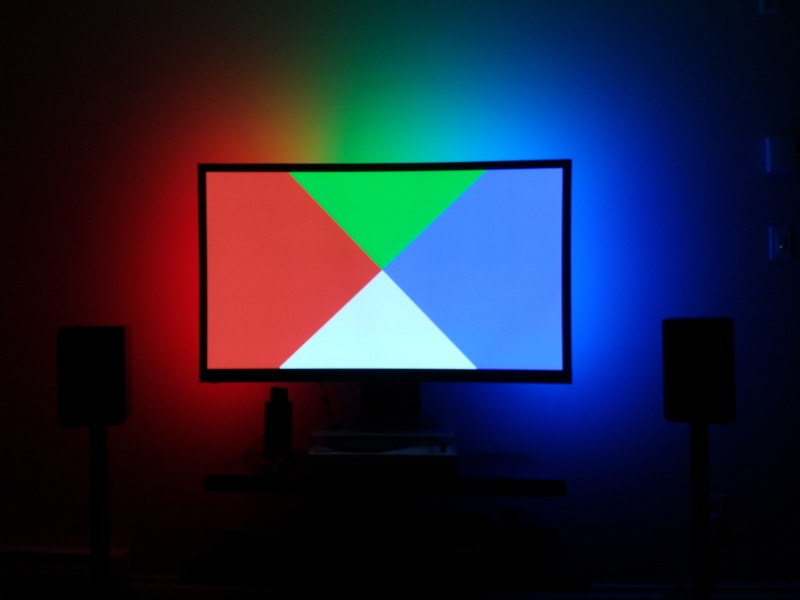
It works in a setup with an HTPC (so not on a chromecast or gaming console) by running software which reads the average colour on the edges and corner of the screen and sets the closest LED to that colour.
The effect is that the edges of the screen seem to “bleed” out behind the TV. This might be a little tacky for some things, but it can be a cool effect making flashes of light extra powerful, as well as increasing contrast between light and dark scenes. It pairs execllently with any movie featuring laser guns.
LEDs
I bought a 5m strip containing 150 LEDs (30 per meter) from AliExpress for 17.53 USD. These were the only new purchase for this project.
These LEDs are individually addressable, it’s possible to set the colour of any LED on the strip from a single control signal wire attached to the first LED.
The strip can be cut between any two LEDs, which allows cutting the strips at the corners and soldering wires across.
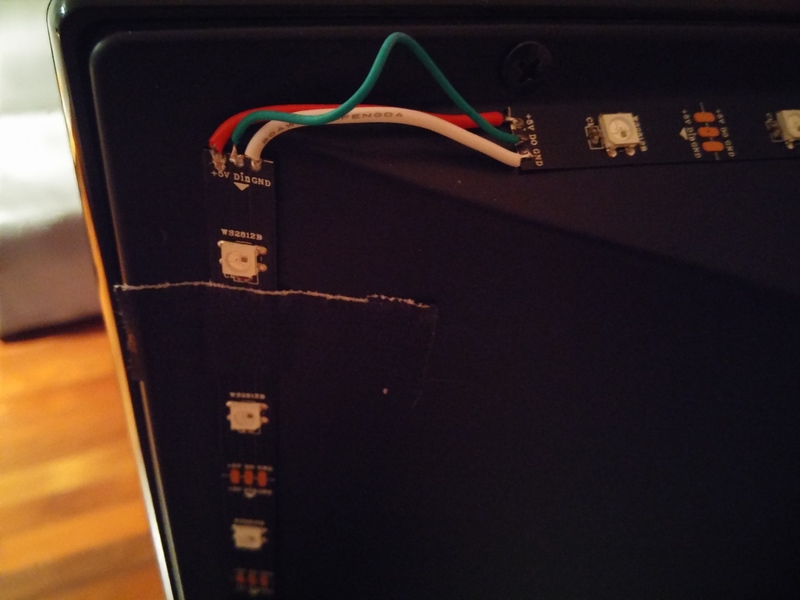
I taped the LEDs directly to the TV with the provided 3M tape backing. This didn’t hold prefectly on the two vertical strips, so I used some Gorilla Tape on the top and bottom to help keep them attached.
Power supply
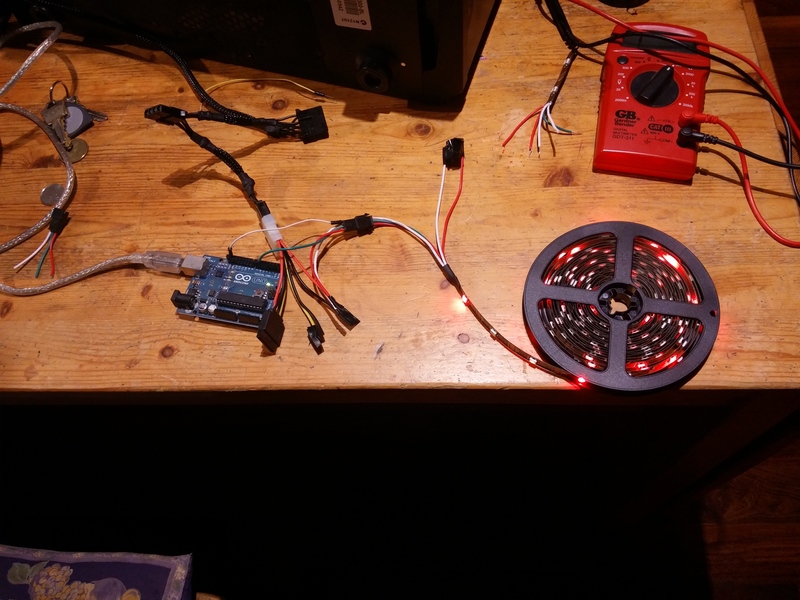
The LEDs I purchased are run at 5V, which is convenient being the same voltage as the arduino’s signal, but awkward to find a power supply for. I wanted a power supply capable of about 10A @ 5V (50 watts), which is uncommon, although adafruit sells one. I settled on using an old ATX power supply, which supplies plenty of current at 5V.
To connect it I sacrificed a molex† to sata connector, cut off the sata end, and soldered the 5V and ground wires to the provided connector. The ground wire from the PSU was also connected to the arduino’s ground. Using the molex connector allowed me to avoid altering an existing power supply. In theory thid could be powered the same PSU powering a desktop PC or a HTPC.
To turn on the power supply, I short the green pin 16 with any of the ground pins.
I might revisit the power supply in the future, as the ATX supply is neither small not particulatly quiet.
† The proper term might be “AMP MATE-N-LOK 1-480424-0 Power Connector”
Software
I expected to spend the most time and effort here, but I spent vurtually none. The existing software works very well and was easy to setup.
Arduino
For initial testing I added the Adafruit_NeoPixel library to the arduino IDE and used the “strandtest” example, modifying the LED count from 60 to the number I was using (150 for the full strip, 72 after they were connected to the TV).
Afterwords I used this modification to Adafruit’s adalight code from this makeuseof tutorial which uses the FastLED library. Again the only change required was adjusting NUM_LEDS. This made it ready to read colour information from the HTPC.
HTPC (Linux)
There were a few options available to send colour data to the arduino from the HTPC, including Adafruit’s processing code, and boblight, but I settled on hyperion. Though it targets primarily the RaspberryPI (from which it can drive the LEDs directly without an arduino in between) it works great on any linux.
Hyperion includes letterbox detection, a command line remote control utility, scriptable effects, and output to a few different devices.
I was able to configure my exact setup through hyperion’s HyperCon utility
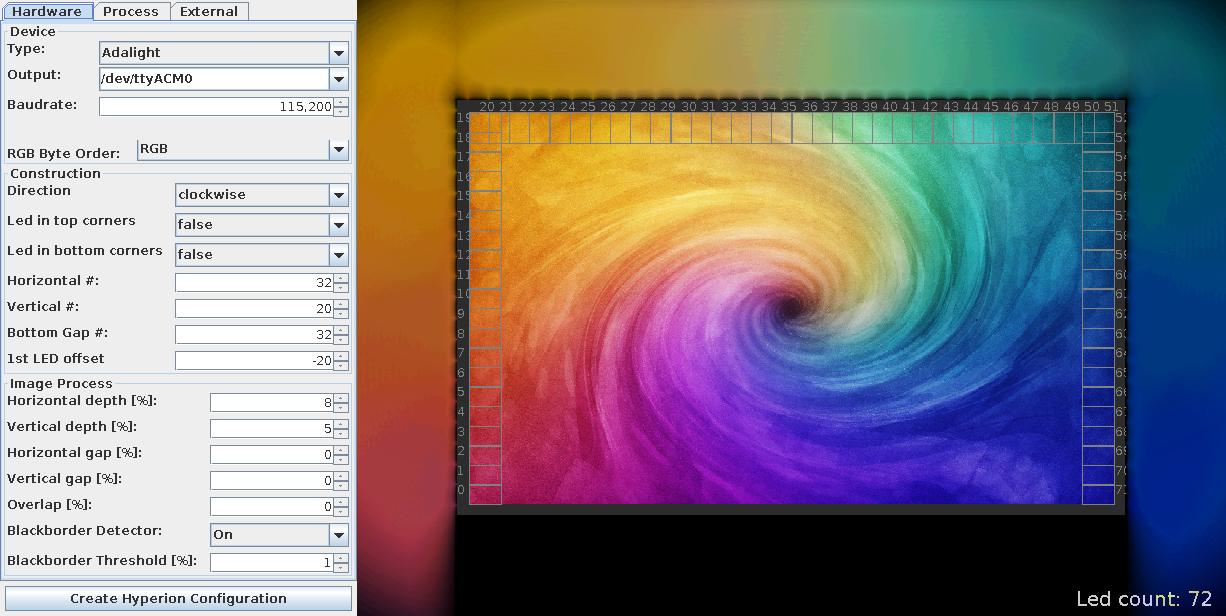
I also merged an open PR from the project into my local copy to improve the letterbox detection, which was a little buggy.
Conclusion
The only purchase I made for this project was the LEDs:
- LEDs - $17.53 USD new from AliExpress
- Power supply - $0 (any old PSU would do, old actually better, as newer ATX power supplies do not include molex connectors)
- Arduino - $0 had around ($20-$30 new)
Tools required:
- Multimeter - just to double check vultages, resistances, and continuity. Not strictly necessary
- Soldering iron - I have a Hakko FX888D, which is great. I’m sure any will do.
- Wire cutters, strippers, etc. - I was too lazy to find these and used my leatherman
I would recommend this as a fun electronics project as it was extremely simple, and the result is rather pleasing. Other than the difficulty of finding an appropriate power supply it is largely plug and play, and suitable for a beginner like myself.